The WordPress Toolkit simplifies daily tasks required to manage and secure WordPress sites.
Save time on WordPress site and security management. Spend more time on your core business.
With Plesk 12 and the WordPress Toolkit, you will be able to:
- Manage multiple WordPress installations, plugins, and themes from a single point of entry
- Easily install, update, and remove WordPress, plus activate and remove plugins and themes
- Securely install WordPress and harden any existing WordPress installation by applying the most common recommended security settings with rollback support
The WordPress Toolkit is included in both the Plesk Web Pro and Web Host editions. All Plesk 12 hosting plans include this essential WordPress service at no additional cost.
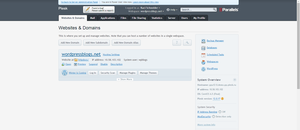
WordPress Installation Management.
Manage multiple WordPress installations, plugins, themes, updates, and upgrades from a single point of entry.
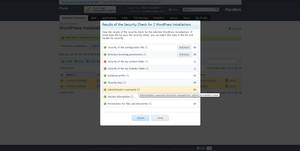
WordPress Security Management.
Scan WordPress installations to identify insecure settings and secure them in one click.
 This is because Gmail users (yourself or others) have marked emails from you as spam either deliberately or accidentally.