How to: Setup Email using Apple Mail

The instructions provided in this section were verified against Apple Mail 8.2. They might not work with earlier or later versions of Apple Mail.

To set up Apple Mail:

  1. Open Apple Mail and choose the Add Other Mail Account option from the list.

  2. Click Continue.

  3. Specify your full name, your email address and password, and click Create. After you are prompted to configure the account manually, click Next.

  4. Specify the following:
    • Account type. Select IMAP if you want to keep copies of received email messages on the server. Select POP if you do not.
    • Mail Server. Type in your domain name, for example, example.com.
    • User Name. Type in your full email address.
    • Password. Type in your password.
    • Click Next.
  5. Specify the following:
    • Path Prefix: Enter INBOX as the path prefix.
    • Port. Use port 143 if you selected IMAP or 110 if you selected POP. If you leave it set to AUTO sometimes the wrong port is used.
    • Option Use SSL: Please leave the option as unchecked.
    • Authentication. Select Password from the menu.
  6. Click Next.

  7. Specify the following:
    • SMTP Server. Type in your domain name, for example, example.com.
    • User Name. Type in your full email address.
    • Password. Type in your password.
  8. Click Next. When prompted for additional information, click Next again.

  9. Specify the following:
    • Port.Use port 587. If you leave it set to AUTO sometimes the wrong port is used.
    • Use SSL. Please leave the option Use SSL as unchecked.
    • Authentication. Select Password from the menu.
  10. Click Create.

Troubleshooting Apple Mail SMTP – Cannot Send Emails

If you are having problems with Apple Mail SMTP using IMAP, ensure you are using the following settings: Mail > Preferences > SMTP > Edit SMTP Server List > Advanced

  • Automatically detect and maintain account settings: No
  • Port: 587
  • Use SSL: No
  • Authentication: MD5 Challenge-Response
  • Allow insecure authentication: Yes

How to: Login to RoundCube

RoundCube is our preferred webmail client. It is fast, lightweight and very easy to use. RoundCube is well known for its Ajax driven user interface.

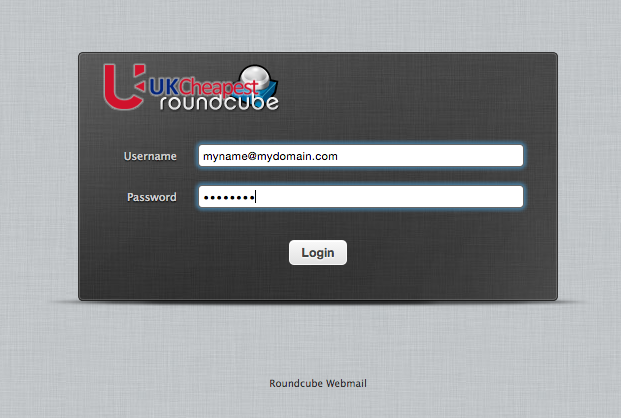
Logging into RoundCube is very easy. Unlike AtMail, RoundCube requires your email address – all of it – as your username. If you are used to AtMail then you may be accustomed to typing only the prefix.

By using the full email address, your login screen should look something like this:

Screen Shot 2015-05-06 at 06.29.33

All of our Plesk 12 hosting services now use RoundCube as default. AtMail is no longer offered as an option due to performance issues. Unfortunately the AtMail address book is not compatible with RoundCube, you will have to recreate your entries.

Beyond the Basics

View the RoundCube User Guide to gain the most from this brilliant webmail application.

How to: Create an email signature in RoundCube

Screen Shot 2015-04-27 at 17.38.50An e-mail signature is a block of text that is appended to the end of an e-mail message you send. Generally, a signature is used to provide the recipient with your name, e-mail address, business contact information, or Web site URL.

  1. Login to your RoundCube webmail service
  2. Click on the “Settings” cog in the top-right of the panel
  3. Locate your email “identity” from the list
  4. Click on the “identity” and clck on the “Signatures” tab. If you wish to use HTML formatting in your signature, select the “HTML Signature” checkbox.
  5. Enter your desired customised signature in the “signature” box and press “Save”.

How to stop Gmail marking your emails as SPAM

Why is Gmail marking emails as SPAM?

Screen Shot 2015-06-15 at 12.27.52This is because Gmail users (yourself or others) have marked emails from you as spam either deliberately or accidentally.

Gmail automatically helps identify spam and suspicious emails by detecting viruses, finding patterns across messages, and learning from what Gmail users like you commonly mark as spam or phishing.

If you click your Spam label and open one of the messages, you’ll see a warning label at the top with a brief explanation about why that particular message was placed in Spam. If we think something is suspicious, we’ll mark the message with a warning label in your inbox for you.

You (or someone else) previously marked these messages as spam by clicking the “Report spam” or “Report phishing” button. Both actions will send the message to your Spam folder and remove it from your Inbox.

What you need to know

After you report spam for several messages from the same sender, our system will learn from your behavior and might continue placing that sender’s messages to Spam even if you don’t specifically report them.

Also know that you can create filters to route certain messages from Spam to your Inbox, or route spam messages to your Trash. We’ll let you know whenever your filters caused a message that our system identified as spam to be moved to your Inbox; if you want those messages to stay in Spam, consider changing your filters.

Actions you can take

If you don’t want the message to be in Spam, click the “Not spam” button to move it into your Inbox. If you mistakenly marked it as a phishing scam, please click the down arrow next to “Reply” at the top-right of the message pane, and select “Report not phishing” to let us know that the message is legitimate. By reporting that a message is not spam or phishing, you’ll help teach Gmail’s system what to do when it sees a similar message in the future.

Source: Gmail Spam and Suspicious Emails

How to fix: iPad / iPhone IMAP error “unable to move message to trash”

When moving or deleting an email on your iPhone you get the error:

0

This only happens if you are using IMAP servers for your email and isn’t an issue for POP mailboxes.

How-to fix this error

1. Press the Home button and choose Settings.

1

2. Scroll down and click Mail, Contacts, Calendars.

2

3. Tap your email account.

4. Scroll to the bottom and click Advanced.

3

5. Scroll to the bottom and tap the empty IMAP Path Prefix.

iphone imap prefix

4

6. Enter INBOX in capitals, then click ‘Accounts’ at the top left and click ‘Done’ at the top right twice to close the settings.

5
Can’t see the IMAP path prefix?

If this happens to you then you have to delete your IMAP email account and add it again manually. Follow these instructions to add your email account to your iPhone manually. This will then let you see the Advanced button.

7. Press the Home button and then re-open Mail.

8. You will now be able to delete or move your emails on your iPhone.