1. What is a Custom Domain Email Address / Mailbox?
A Custom Domain Email Address (or mailbox) is an email account that uses your own website’s domain name instead of a generic email provider like Gmail or Yahoo. For example, instead of john.doe@gmail.com, you would have john.doe@yourdomain.co.uk.
This mailbox lets you send and receive emails using your custom domain, giving you greater control and professionalism.
How is this different from full email hosting?
A mailbox provided with your domain offers basic email capabilities, typically accessed via webmail or configured in email clients using POP or IMAP protocols. Full email hosting services usually provide additional features like calendars, contacts, advanced spam filtering, and larger storage limits.
Why use a domain email address?
- Professionalism: Using a custom domain email looks more credible and trustworthy to your clients and contacts.
- Branding: Every email you send promotes your brand and reinforces your online presence.
- Control: You manage your email addresses and accounts, not a third-party free provider.
- Customisation: Create personalised addresses like sales@yourdomain.co.uk or info@yourdomain.co.uk tailored to your business needs.
2. How to Get a Mailbox?
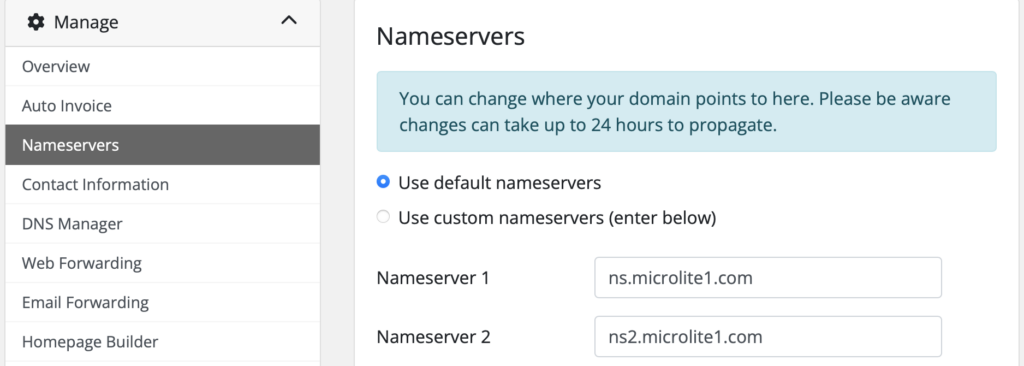
If you have a parked domain using our default nameservers, you’re eligible for a custom domain mailbox.
To get your mailbox:
- Log in to your Client Area.
- Navigate to Domains and select the domain name you want to use.
- In the sidebar menu, click on Custom Domain Email.
- Choose your desired mailbox product (Basic, Standard, or Pro).
- Follow the prompts to create your mailbox and set your mailbox name (prefix) and password.
- Once created, you can access your mailbox via Roundcube Webmail or configure it in your email client.
If you don’t see the option, ensure your domain is parked with our nameservers. Contact support if you need assistance.
3. How to Access Your Mailbox
You can access your custom domain mailbox in several convenient ways:
Using Roundcube Webmail
Access your mailbox directly from any web browser without needing to configure anything.
- Webmail URL: https://webmail.ukc.uk
- Enter your full email address (e.g., john.doe@yourdomain.co.uk) and password to log in.
- Once logged in, you can send, receive, and manage your emails from anywhere with internet access.
Using Third-Party Email Clients
If you prefer to use desktop or mobile email applications like Microsoft Outlook, Thunderbird, or Apple Mail, you can configure them with the following settings:
- Incoming Mail Server (IMAP): microlite1.com
- Port: 993 (SSL/TLS)
- Incoming Mail Server (POP3): microlite1.com
- Port: 995 (SSL/TLS)
- Outgoing Mail Server (SMTP): Use your Internet Service Provider’s SMTP server
- Username: Your full mailbox name (e.g., john-doe-yourdomain-co-uk)
- Password: Your mailbox password
Note: IMAP keeps your emails synced across all devices, while POP downloads emails to your device.
Mobile Access Tips
- Use the built-in mail apps on your iPhone, Android, or tablet.
- Enter the same server settings as above for IMAP or POP.
- For quick access without setup, simply use Roundcube webmail via your mobile browser.
4. Setting or Resetting Your Mailbox Password
How to Change Your Mailbox Password
You can easily change your mailbox password anytime through your client area:
- Log in to your Client Area.
- Navigate to Domain Management and select your domain.
- Find the Mailbox or Custom Domain Email section.
- Use the provided option to set a new password for your mailbox.
- Save your changes – your new password will be effective immediately.
Password Requirements and Tips for Security
To keep your mailbox secure, your password must:
- Be at least 8 characters long (maximum 16 characters).
- Include at least one uppercase letter, one lowercase letter, and one number.
- Not contain spaces or special invisible characters.
- Avoid common or easily guessed passwords (e.g., “password123”).
Security Tips:
- Use a unique password that you don’t use elsewhere.
- Avoid using personal information like birthdays or names.
- Change your password regularly to maintain security.
5. Mailbox Storage and Limits
Mailbox Sizes by Product Type
Each mailbox plan offers a different amount of storage to suit your needs:
- Basic Mailbox: 1GB of storage – ideal for light email use.
- Standard Mailbox: 5GB of storage with added spam protection – perfect for most small businesses.
- Pro Mailbox: 10GB of storage with priority support – great for heavy email users and professionals.
What Happens If Your Mailbox Fills Up?
If your mailbox reaches its storage limit:
- You may stop receiving new emails until you free up space by deleting old messages.
- Some incoming emails might bounce back to the sender with a notification that your mailbox is full.
- You will not be able to send emails until you free up space or upgrade your plan.
How to Upgrade Storage
If you find your mailbox storage isn’t enough:
- Log in to your Client Area.
- Navigate to your domain’s mailbox product.
- Choose an upgrade option to a higher storage plan.
- Complete the upgrade process – your storage will increase immediately or within a few minutes.
- Contact support if you need assistance with upgrading.
6. Spam Protection and Security
Spam Filtering with SpamAssassin
To help keep your mailbox clean and free from unwanted junk emails, we use SpamAssassin, a powerful spam filtering system running on our mail servers.
- Incoming emails are automatically scanned and scored for spam-like characteristics.
- Emails identified as spam are marked or moved to a spam/junk folder, helping you focus on important messages.
Malware Scanning with Maldet
In addition to spam filtering, we employ Maldet (Malware Detect) to scan all email attachments for malware and viruses.
- Suspicious or harmful attachments are flagged or blocked to protect your device and data.
How to Report Spam or Phishing Emails
If you receive a suspicious email that bypasses the filters:
- Do not open attachments or click links in the email.
- Forward the email to our support team at abuse@uk-cheapest.co.uk with the subject “Spam/Phishing Report.”
- Delete the email from your mailbox after reporting.
7. Configuring Email Forwarding
How to Forward Emails from Your Domain Email Address
If you have a parked domain using our default nameservers, you can easily forward emails sent to your domain’s aliases to any external mailbox of your choice. This is perfect if you want emails addressed to info@yourdomain.co.uk or sales@yourdomain.co.uk to be redirected to your main mailbox or another email account.
To set up email forwarding:
- Log in to your Client Area.
- Navigate to the domain management section for your parked domain.
- Locate the Email Forwarding section.
- Add or edit forwarding aliases by specifying the prefix (alias) and the destination email address.
- Save your changes – forwarding is typically active within minutes.
Limitations and Best Practices
- There are no limits on the number of forwarding aliases you can create. Feel free to set up as many as you need.
- Choose aliases carefully to minimise spam. Generic aliases like info or admin tend to attract more unsolicited mail.
- Regularly review and update your forwarding rules to keep them relevant.
- Forwarded emails depend on the external mailbox’s availability and configuration; ensure your destination mailbox is functioning correctly.